

The Journey to a New Prosthesis: A Step-by-Step Guide
Getting a new prosthesis is a major milestone, whether it’s your first or your fifth. The process can feel overwhelming, but it doesn't have to be. As a below-knee amputee and biomedical engineer, I’ve been through this journey many times over my 30 years as an amputee. My goal with this guide is to empower you with the knowledge you need to navigate the process with confidence, from asking the right questions to advocating for yourself every step of the way.
Before You Begin: Do Your Research and Ask the Right Questions
Researching before you start the process is crucial. It might sound tedious, but the more you know going in, the better you’ll feel. Your prosthetist will be your partner, but you are the boss.
Before you even step into a clinic, ask yourself these questions:
Does my insurance cover prosthetics? You'll need to understand your policy and what it covers.
What are my goals for this prosthesis? Do you want it to be as light as possible? Do you need it to be waterproof or durable for athletic activities? Do you want it to have a specific cosmetic look?
What providers are out there? I've been to many different providers over the years. Finding the right fit for you is important, and you should always feel empowered to make a change if you need to.
I also highly recommend talking to other amputees. They’re not trying to sell you anything; they're just speaking from personal experience. Look for online communities, support groups, or local organizations. Their insights can be invaluable.
Step 1: The Prosthetic Evaluation
The evaluation is the foundation of your entire journey. This is where you advocate for your goals and needs. Your prosthetist will:
Listen to your goals and lifestyle. Be honest and specific about what you hope to achieve.
Take a detailed medical history. They need to understand your overall health.
Evaluate your residual limb. They will check its shape, size, and skin condition.
Take measurements and review options. They’ll work with you to design a prosthesis that suits your unique needs.
Remember, you can absolutely achieve and even exceed your physical goals. A proper fitting prosthesis is the key.
Step 2: The Insurance Waiting Game
After the evaluation, you and your prosthetist submit the necessary paperwork to your insurance company. Then, you wait—and it can feel like forever.
I have a funny story about this: I was a patient at Shriners Hospital until I was 18, and everything was free. This was great, but when I turned 18, I had a difficult time explaining to my insurance that I had been an amputee for 14 years. It can be a waiting game, but be patient and persistent.
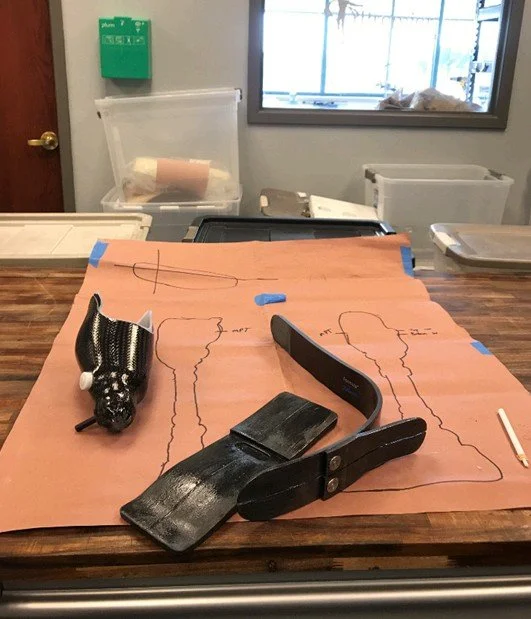
Step 3: Fitting and Fabrication
This is where the magic happens. The fitting process begins with casting your residual limb (that's the part of your leg or arm that's left below the joint) to create a diagnostic check socket. This is usually made of clear plastic, which allows your prosthetist to observe pressure points and problem areas.
Do not rush this process. Your prosthetist may make multiple check sockets to get the fit just right, including a walking check socket for you to try in the office. It might feel long and drawn out, but taking the time now will minimize issues down the road. A well-fitting socket encourages muscle growth and helps you achieve a healthy gait pattern.
Once you are completely comfortable with the check socket, a final definitive socket is created. If you are frustrated and lie about the level of comfort just to get it over with, you will be living with that discomfort until insurance allows you to go through this process again. Be honest with yourself and your prosthetist.
Once the socket is complete, your prosthetist will select the other components—like the foot, knee, or hand—from leading manufacturers based on your goals and needs.
Step 4: The Adjustment Period (Post-Fitting)
You finally get to take your new, shiny prosthesis home! Your spirits are high, and you're ready to conquer the world. Then a few days pass, and you start to feel sore. Your skin is irritated. Your muscles feel tight. What's happening?
Don't panic. A new device takes time to get used to. I like to compare it to a brand-new pair of shoes. For me, with my new leg, I got overzealous and wore it all day on the first day, even attempting to run. I ended up with a knot on the side of my leg and a swollen knee. I took a break the next day and eased into it. When I had my follow-up appointment, I was able to tell my clinician about the specific pressure point that was bothering me. He made an adjustment, and the pain went away.
Take a week or so to get used to your device. Don't toss it in the closet and go back to crutches, but also don't overdo it. Take breaks, but keep pushing through some of the initial discomfort. If you're still in a lot of pain after a week, reach out to your clinician.
This is a journey, and you are in the driver's seat. By being informed, patient, and a strong self-advocate, you'll be well on your way to adapting and thriving with your new prosthesis.
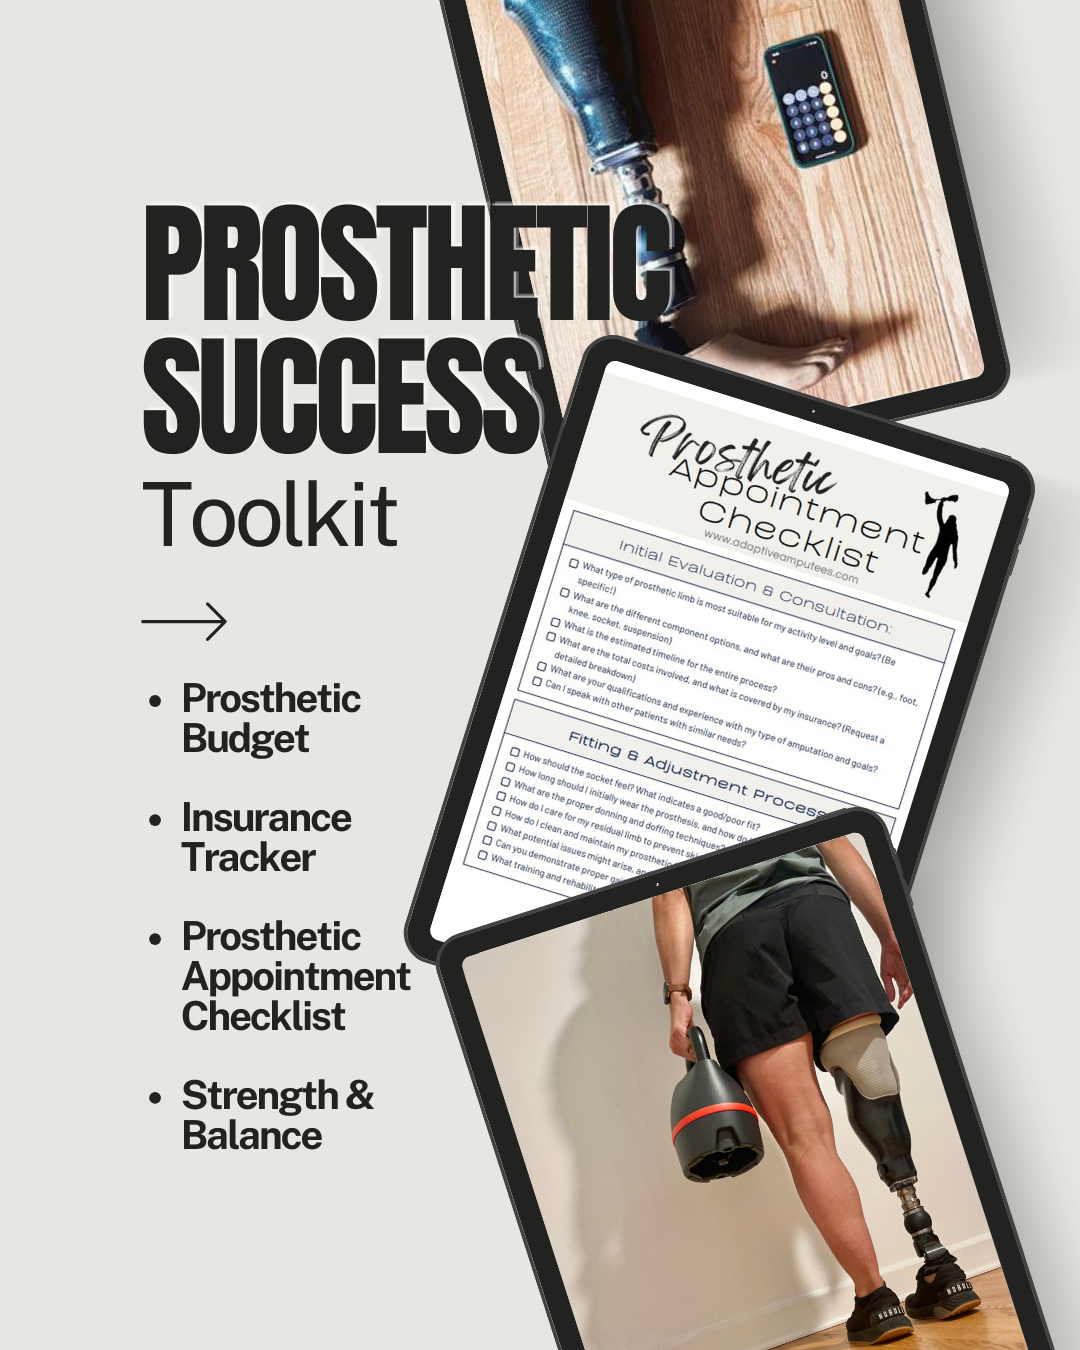
These are about managing the prosthetic process, appointments, and costs.
Items inluded
Prosthetic Budget Planner: Know the Real Cost of Your Prosthesis
Insurance Tracker
Prosthetic Appointment Checklist
Adaptive Workout Tips